Home » 9 Essential Steps to Building an ADU in California
9 Essential Steps to Building an ADU in California
Table of Contents
Everything You Need to Know About the ADU Building Process
Share Post :
Building an Accessory Dwelling Unit (ADU) is one of the smartest ways to create extra income, living space, or long-term value on your property. But how do you actually get started? Whether you live in Sacramento or the Bay Area, here are the 8 key steps to building an ADU—from concept to completion.
Step 1: Check If Your Property Qualifies
Before anything else, verify if your property meets local zoning and space requirements. Most single-family homes in California qualify for at least one ADU and one Junior ADU (JADU). Key things to look for:
Adequate lot size
Access to utilities
Setback and height limits
Local zoning and HOA rules
At IMKAT, we offer a free ADU property assessment to help you determine eligibility.
Step 2: Personalized ADU Consultation
Before any paperwork or design begins, we start with a one-on-one, on-site consultation. Our ADU consultants meet you at your property to evaluate everything: space, access, layout options, setbacks, and utility connections. We’ll walk the lot with you, answer your questions, and begin shaping your vision into a feasible plan. From there, we’ll provide a realistic project estimate and explain your next steps.
This is where your ADU starts to come to life—and it’s completely free.
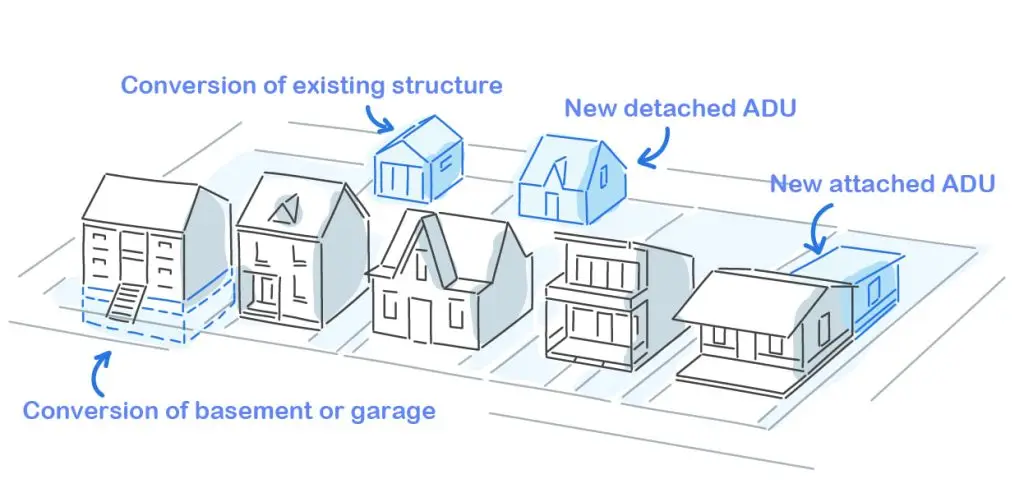
Step 3: Choose the Right ADU Type
There are a few different types of ADUs:
Detached ADU (separate structure)
Attached ADU (connected to the main home)
Garage Conversion
JADU (Junior ADU within existing space)
Your goals, space, and budget will help determine which is right for you.
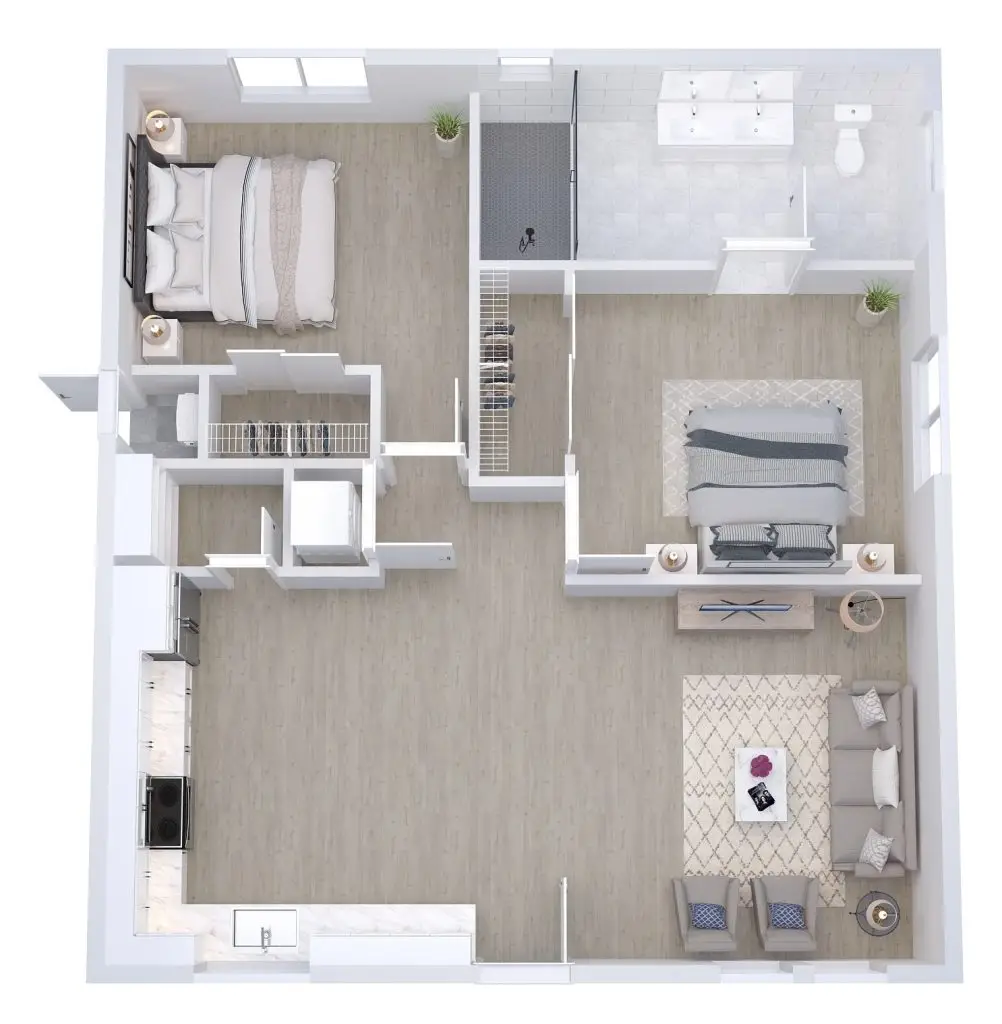
Step 4: Design & Floor Plan Development
Next comes one of the most exciting parts of the process—design. Our team visits your site to gather measurements and assess layout potential. You’ll work closely with our in-house architects to select or customize the perfect floor plan. This includes two free revisions to ensure your ADU fits both your property and your vision. Once finalized, we’ll invoice for the initial floor plan and move straight into drafting permit-ready construction documents.
Step 5: Submitting & Navigating Permits
Permit approval is one of the most complex and time-sensitive stages—but we handle it all for you. We’ll submit your ADU plans to your local city or county planning departments, including building, environmental, and fire as needed.
Most permits take 12–16 weeks to be approved. Throughout this time, you’ll get bi-weekly updates on your project status so you’re never left wondering what’s next.
Step 6: ADU Interior Design
While permits are in progress, we shift gears to interior design. You’ll meet with our in-house designer at the IMKAT showroom to review curated design packages, material samples, and customization options.
This is your chance to make your ADU feel like home—from flooring and fixtures to cabinetry and countertops.
Step 7: Preparing the Site
Once permits are approved, your contractor will prep the site. This may include:
Demolition (if converting a garage)
Grading or excavation
Utility trenching (water, sewer, electricity)
Laying the foundation
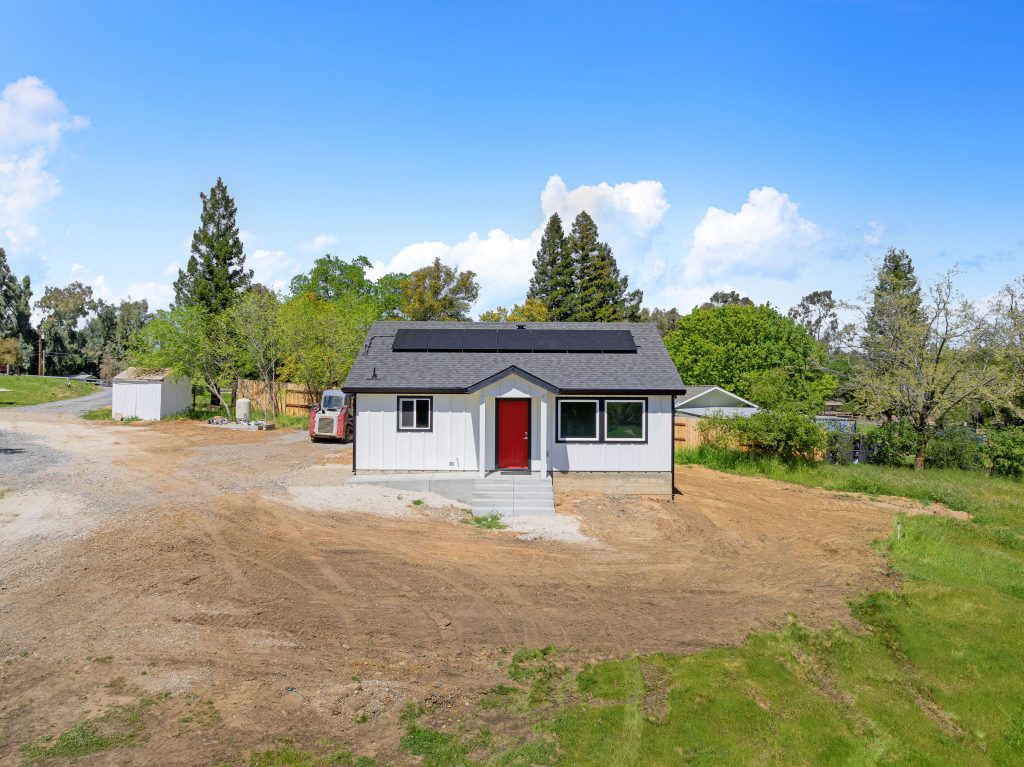
Step 8: Building the ADU
Construction officially begins, and it’s broken into three phases:
Foundation & Framing (5–6 weeks): Concrete, structure, and frame go up.
Mechanical, Electrical, and Plumbing (5–7 weeks): The essential systems are installed.
Interior Finishes (4–5 weeks): Cabinets, flooring, fixtures, paint, and final details are completed.
On average, the full construction takes between 14 and 18 weeks.
Step 9: Final Inspection & Move-In
After we complete construction, your local building department performs a final inspection and issues your Certificate of Occupancy. IMKAT handles professional cleaning and final walk-throughs to ensure everything is turn-key. From there, it’s ready to rent, move in, or welcome family.
Ready to Build Your ADU?
At IMKAT, we handle every step of the process from design to construction. Get a free consultation today and see what’s possible on your property.